MEMORY MANAGEMENT

As we have previously stated we will be creating this game for the Amiga 500 with 1mb RAM. In my opinion this is the classic Amiga setup and see no point in creating AGA versions for A600/A1200 as no one I knew had one back in the day, but everyone had an Amiga 500 and indeed most had the 1mb upgrade. So the challenge is to create within the limitations.

The internal 512Kb RAM will have to contain everything we need at runtime to make the game happen, that is the display, audio and code. This is because the Amiga Blitter, Copper and Paula chips interact directly with this RAM chip (is the way I understand it anyway).

So we will use the additional 512Kb for stuff we want to swap in, this can be things like additional spritesheets and audio we don’t need all the time etc. an example would be Willy’s gun sound, we don’t need this until the end of Level 5 so we will make it available just before we need it.

This approach frees up the internal RAM somewhat in the hope we can have all the music and graphics from the arcade game without having to sacrifice anything due to RAM limitations.

With that said and the work done so far, we can start to do some super rough calculations:

  • Internal 512Kb RAM

    • Music 70Kb (will contain the level, boss and cutscene music in the same file)

    • SFX 70Kb (these will be the core most used sounds)

    • Display 40Kb (the screen is 256 x 240 x 5bitplanes)

    • Code 30Kb

    • This leaves 300Kb currently

  • Expansion 512Kb RAM

    • Background Tileset 50Kb

    • Player Sprite 70Kb

    • Enemy Sprites 200Kb (ish..)

    • Additional GFX such as weapons, fonts 70Kb

    • Additional Audio 50Kb

    • Cutscene GFX 20Kb

This will all be loaded per level, so when you complete we will cut to the preloaded cutscene GFX and music and then start dumping the old stuff out and loading the next level’s assets in.

Having the game on 2 disks is expected but may not be necessary, we will see on that one :) If it is, then disk swapping will happen during the cutscene so will not interrupt gameplay.

This is all of course based on what we know so far, I expect all of that free memory to be used by one thing or another at some point but it’s all very encouraging.

PROGRESS UPDATE

I’ve been meaning to post an update for a few weeks for the AI but haven’t got round to creating a video for it yet, but I will post that soon. What it will show is that the basic main engine is complete.

We now have a beat’em up engine that can handle multiple enemies in idling, patrolling and attacking states. They all know about each other and make intelligent choices based on the player’s position. It all works really well so I will look forward to showing that off.

I’ve also addressed an issue of responsiveness in that it felt a little sluggish previously, this was because when I am switching between states I am not actually running the code for that state until the next frame. So to solve the issue a state’s code is always run in conjunction with the state change, and this results in super responsive gameplay.

We also have great hitbox collision, this is very clear to see when performing a flying kick.

So to summerise we have completed the following so far:

  • Player controls and moveset

  • Enemy AI for multiple enemies

  • Hitbox collision

  • Take damage, reduce health and die

  • All music arrangements, many already converted to Mod format

  • SFX prepared at both 22Khz and 11Khz, with the 11Khz results more than acceptable due to EQ tweaks

  • Colour palettes for all levels

  • Tilesets ready for 3 levels

  • All sprites prepared

With all this work done so far it allows us to plan how we will use the memory available. See the next update.

AI PART 2

It’s worth noting at this point that my approach to AI is inspired by this guide by David Silverman. When I wrote my first beat’em up engine in Gamemaker a few years ago, this was the guide I followed. In C the way it is coded is different but many of the concepts remain the same.

So today we are showing off those hit boxes I keep talking about and using them to collide with the player, drain health and eventually end their green rectangular life.

First of all we are expanding our ChooseMove function:

We have added a check here to see if the Enemy is close enough to the player to think about attacking. We check this on the X and Z axis.

If close enough then we run the CheckAttackChance function, this is where the enemy will have some randomising AI that controls how aggressively they attack. Eg. the grunt enemies will not attack as frequently as the big boss enemies.

So currently each frame the enemy’s aggressiveness will increase by 1. It then checks to see if the aggressiveness value is higher than a randomly picked number between 0-100.

If so it will trigger the enemy’s Punch1 state (incorrectly labelled as PLAYER STATE PUNCH1 but I’ll clean that up later)

Eventually I will add more code here to choose from a variety of attacks.

So in the SwitchState function we do some one off things like setting the length of the attack and eventually triggering animation and SFX like so:

With the state now set to PUNCH1 the code then comes back into the UpdateEnemyState function where it will run the EnemyAttack function each frame until it is finished.

EnemyAttackTimer simply reduces the attack_timer value by 1 each frame.

We then trigger the hitbox and collision detection some time after the attack has started as we want it to sync with the frame of animation where the arm is extended. We use a hitboxTime argument to control which frame we want this to happen. So if attack_timer is less than say 3 it then triggers the hitbox and collision detection.

When the attack_timer is 0 we then turn of the hitbox, reset their aggressiveness and set the enemy’s state back to Idle (so they can start again).

All of this will be expanded in the future to allow for enemy combos and other things but for now we can do some simple attacking like this.

And what we get may look like a primitive sex game but it provides the basics of our beat’em up engine :)

AI PART 1

The AI for this game will be iterated upon in stages. The first thing we need to achieve is for an enemy to first follow a player.

As mentioned previously our players and enemies are now belong to our GameWorld in code. This essentially means that the player code and the enemy code can access each other’s variables such as position & health. These 2 variables are important, because the enemy will need to know the player’s X & Y position to be able to move towards them and they will need to access the player’s health to pass damage to them (when they attack).

As the game is in pseudo 3D, we will use a Z coordinate for the player (and enemy), this for the most part will be the same as the Y position except when the player jumps, in which case Y will go up and down, while Z will remain the same. The reason we need this is so the enemy does not follow the player’s actual Y position on screen when they jump. The player is simply jumping up and down from a Y position, hence Z can be used.

So for the code the first thing we will do is make the enemy check the position and distance of the player, we write this like so:

enemy->target_dist_x = distance(enemy->xpos,gameWorld->player1.xpos);

enemy->target_dist_z = distance(enemy->zpos,gameWorld->player1.zpos);

The enemy holds variables for the target distance for X and Z. We call a function I wrote called distance and pass 2 arguments, the enemy’s X position and the player’s X position. This is a very simple function that returns the difference between 2 values.

int distance(int a, int b)

{

int distance;
distance = (b-a);
return distance;

}

So now we have distance values for both X and Z we can start to do something with it. Another variable we will use for the enemy will be SIGHT_RANGE, this will be the distance the player will need to be to the enemy before the enemy thinks about doing something, otherwise they will Idle.

if (enemy->target_dist_x > -SIGHT_RANGE && enemy->target_dist_x < SIGHT_RANGE)

{

ChooseMovement(enemy, gameWorld);

SwitchEnemyState(PLAYER_STATE_WALK, enemy, gameWorld);

}

else

{

SwitchEnemyState(PLAYER_STATE_IDLE, enemy, gameWorld);

}

As you can see if the player is within range we then call a ChooseMove function. This is basically the enemy deciding whether to move to the front or back of the player. In the future this will take in many other factors such as other enemies already being in those positions, but for now it is simple.

if (enemy->target_dist_x < 0)

{

PositionFront(enemy, gameWorld);

}

else

{

PositionBack(enemy, gameWorld);

}

So if the X target distance value is negative then they will move to the front of the player. If it is positive then they will move to the back.

PositionFront and PositionBack are 2 functions we use to start to control the movement of the enemy. ATTACK_RANGE is a variable we will use to set the distance an enemy should place themselves away from the player to attack. So we do the following for positioning in front of the player (to the right).

if (enemy->xpos > gameWorld->player1.xpos+ATTACK_RANGE)

{

enemy->xvector = enemy->xspd*sign(enemy->target_dist_x);

}

else if (enemy->xpos < gameWorld->player1.xpos+ATTACK_RANGE-10)

{

enemy->xvector = enemy->xspd*-sign(enemy->target_dist_x);

}

Walk(enemy);

Here we are saying if the enemy is not yet at in position then set their X vector (the variable we use to move the enemy) to their walk speed in the direction of the player.

Else if the enemy is too close (i.e. on top of the player) then move back a bit.

At the end we call the Walk function which uses the X vector to move the enemy’s X position like so:

enemy->xpos += enemy->xvector;

We do the same for the Z position. This is what it looks like:

PALETTE

As talked about in the last post we have 22 essential colours (including transparency). These are loaded into memory at the start and do not change.

We then have 10 more colours loaded into memory that we can change when loading the next level.

The Amiga uses 12 bit colour, and you state each colour using a 3 digit Hex value. The arcade also used 12 bit colour so we have access to the same colours that it used. The arcade however displayed upto 384 colours on screen, we have only 32 colours to work with.

What usually happens when reducing the amount of colours is you lose all the depth out of your graphics. With the dark colours often being overlooked in favour of a variety of palette. What follows is usually a bit of a garish mess with no shading and a flat feel.

I have paid particular attention to retaining the depth of the original graphics, so although the colours may be different the level of grading is the same. Take the car for example.

The arcade version on the left uses 7 reds in total, with it being the only place on the level reds are used that much it would be a waste to dedicate that many colour slots just to the car. That said, the car is very iconic so it has a priority. In this case I have dedicated 2 colours to it, 623 and 823.

The darker shades come from skin tones and Jimmy’s reds in the essential list. So by grading between the pink tones of Jimmy and the brown tones of the skin we are able to create very smooth grading over 6 colours for the car. Hence we retain almost all the depth of the original graphics (we lose 1 grade). Colours 623 and 823 are not needed for level 2 so they are swapped out.

Check out the sprites comparison below, the arcade versions are on the left again. I gave priority to skin tones, as these are the colours you see the most throughout the game. By reducing the saturation of certain browns we can then reuse those colours for background colours. The output is almost identical.

Another example of colour choice, Billy uses 3 blues in the arcade version. My version uses 2 and then a dark grey for the other. The mid blue is then desaturated a bit so the it is less jarring when combined with the dark grey. Your eye doesn’t notice the difference unless it’s side by side with the original :)

By desaturating certain colours we then achieve a palette where combinations are more achievable, and by keeping the very light shades vibrant we retain the vibrancy. Overall the palette may be a bit more grey we still get that pop from the sprites, and we have gone from 384 colours to 32.

Regarding the resolution, we have chosen 256x240 to remain faithful to the arcade. Resolution has an impact on the feel, and seeing as we would gain a performance increase, this feels the right decision.

TILESHEETS & TILEMAPS

As is standard with old games a tilesheet and a tilemap are necessary for building the levels. I have been working hard to create a dedicated palette with 10 swappable colours per level. Using this I have been able to create an indexed colour tilesheet. The tiles are 16x16 pixels.

To create the tilemap I am using Tiled, a great piece of software by Thorbjørn Lindeijer. A great feature is that the tilesheet can be updated live, so I can have Photoshop open and tweak bits and see it update live in Tiled. Very cool! I have used this to tidy up a few bits that looked a bit off.

Tiled can export a .csv tilemap file which basically gives you a bunch of number in rows that correlate to the 16x16 tiles in the tilesheet. We can import this data along with the tilesheet and rebuild it in our code. So you get something like this:

Once all the elements come together, the mock up below shows the exact assets we will be drawing to the Amiga screen (best viewed on a CRT!)

This mockup uses 32 colours and a 256x240 resolution (same as the arcade).

QUICK CATCHUP

Just a quick one to say we’ve making loads of progress on a variety of things which I will detail more closely in future updates.

The default moveset is now complete, we added the back elbow and headbutt last night. It works brilliantly, even with one joystick button it all feels good.

We are also prepping for how we are going to bring in the graphics, bearing in mind we will be switching the palette between levels. What I have discovered is that with some very careful planning I have been able to retain all the depth of the arcade sprites and most of the background details, just by being economical and artistic with the palette choice. This improves greatly upon earlier mock ups.

I was never a fan of the woods graphics, and noticed they changed this in the GBA version, so I have done a rework myself providing a far moodier setting over the garish original.

In a future update I’ll do some proper sprite and background comparisons.

In addition we are setting up hitboxes, animation systems and enemy AI and I’ve completed pretty much all the music.

BASIC MOVESET & LINKING COMBOS

The following clip shows we can now trigger all the standing moves, and we can link punches and kicks together. I.e. We can go from Punch2 to a Roundhouse or from a Kick to an Uppercut.

We do this by assign a combo value to each move. So Punch1 is 1, Punch2 is 2, Uppercut is 3, Kick is 2 and Roundhouse is 3.

We use a combo timer to keep track of the linking, if the player is still within time they can go from Punch 1 to a stronger move, if the time runs out the combo value is reset to 0 and they start with the basic punch and kick again.

In the future I will probably allow finishing moves to be performed on stunned opponents, aswell as part of a combo. But we will see.

Watch the Player State at the top to see the moves being linked. Tomorrow we will draw some hit boxes to really show off the moves.

JUMPING AND BOUNDARY COLLISION

Something I was excited to see working was the code I had previously written for jumping. It works by taking note of the starting Y pos. We then calculate how much positive or negative speed to add to the Y pos each frame:

yvector = yvector + gravity;

The Y vector is our jump speed in the above code, we add gravity to it each frame to reduce it. This means after a certain point the Y vector will be come negative and this will bring the player back down again.

The following code updates the Y pos each frame by add the Y vector it, initially this is positive taking the player up, as it turns negative the Y pos starts to return to it’s original position.

ypos+=yvector;

When the Y pos returns to the starting position we then change the player state to idle and the jump is finished.

Boundary collision is fairly simple, after we have calculated all the movement we do a final check to see if we have gone beyond our set boundaries. I call a function to do this, checking both the left and right side of the screen:

if (xpos>277) {xpos=277;}

if (xpos<1) {xpos=1;}

So if the player had moved to X pos 280 on the right side of the screen, the code moves it back to 277. Doing the check after all the movement is calculated ensures we don’t get any weird jerky movement.

SETTING UP FOR 2 PLAYERS

Something I forgot to mention in the last update was that we have set up the game to work for 2 players. These players now live in our gameWorld environment and we can can use the same PlayerState code for each player.

The following clip shows the 2 players and also we can see no flicker on the rectangles this time due to the locked framerate.

(note: the clip is a GIF so it will look a bit choppy here)

LOCKED FRAMERATE & STATE MACHINE

We now have our game loop locked at 50fps so each frame is 20ms in realtime. This is important to get in place as it will effect the timings of everything from animation to the feel of the game. If a beat’em up is not fluid and reactive to the joystick input then there is no point. We aim to make the fighting in this port fast and furious so it feels like a proper scrap.

Additionally we have been finishing off the logic of the state machine for the player, and getting it working just right.

From here I will be concentrating on coding the game engine, the AI, hit points etc.. this can all be done with simple rectangles for now. But while i’m working on that my friend will be sorting out displaying graphics onto the screen, and then onto some simple scrolling.

BREAK & MOVING HOUSE

Just a quick update to say I have been on holiday and then moving house for the last 4 weeks so haven’t done any coding. Things will resume this week and in the mean time keep a look out for the next Pixelated Audio podcast where I am the featured composer and I talk briefly about the coding and music for this Double Dragon port. I think that will be dropping in the next week or so!

DID YOU KNOW…

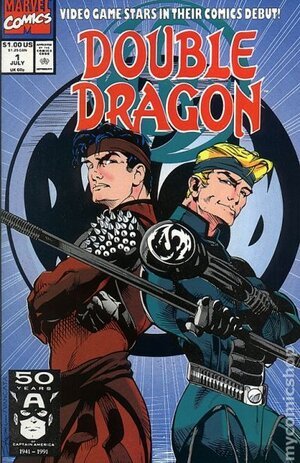
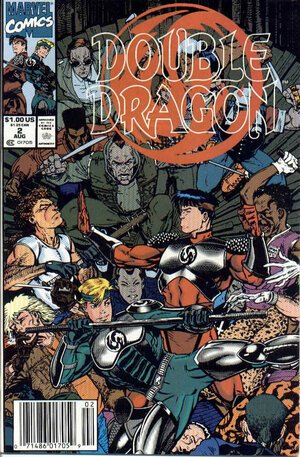
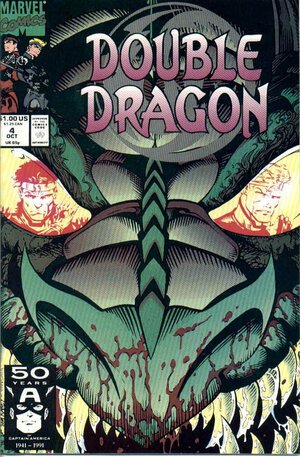
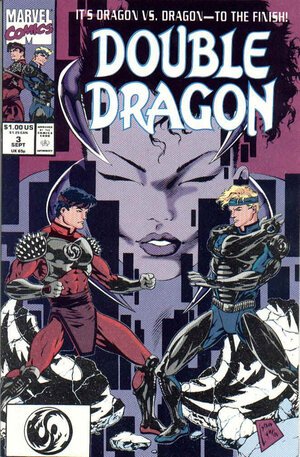
Marvel produced 6 issues of Double Dragon in the early 90’s. Some more info from the Double Dragon Dojo below…

The Double Dragon comic series by Marvel, written by Dwayne McDuffie (Issues 1-4), Tom Breevoort and Mike Kanterovich (Issues 5 and 6) was a six-issue limited series that ran from July to December 1991. Unlike the cartoon and the movie, the comics were released during the height of the game series' popularity. However, much like the cartoon and movies, Technos was not directly involved in the comics and they were done by Tradewest (who held the publishing rights to the first game). Tradewest seemed to portray the dragons not as skilled martial artists and bad asses, but as generic superheroes who get their powers from some sort of artifact, which in this case is a statue. While the comics were better made than the cartoons or the movie, it was still bad. It was nothing like the video game at all. Instead of recognizable villains like Abobo, Burnov or Big Boss Willy, we get forgettable super villains like Superluminal (who is actually an evil Flash), Exoskeleton (a skinless man with cyber implants) and Legerdemain (a wizard).

MUSIC

Being a musician first, this is the easy part for me.

I learned how to write music on the Amiga so having the chance to go back and use Protracker again is really great.

The current plan is to use Protracker with 4 channels of music. 1 channel will be of low priority and will be overwritten by SFX dynamically during gameplay.

Music is generally made up of 4 parts: Drums, Bass, Rhythm and Melody.

So in this case it will always be the rhythm that loses out as I deem it the least important. We will have to trial this once we get the code up and running as it may just not work.

An alternative option will be to see if we can use the TFMX music system (used in games like Turrican). As this will give us upto 7 channels of music (I think) and I believe this gets mixed in software down to 1 output channel, leaving 3 channels for SFX.

The approach to the arrangements is to make it sound typically Amiga. In that we are not trying to emulate the FM sound of the original arcade. What’s the point? The Amiga has a hardware sampler built into it! So we can use some classic sounds from the ST-01 sample disk aswell as some sourced from Double Dragon II and Final Fight (both of which had superb title tracks and some kickass samples).

I am mocking up the tracks in Ableton using the Amiga samples and sticking to 4 channels. I then export the midi files and then convert them into Protracker format. There is some additional work to refine the output by adding all the pitch bends, vibrato, portamento slides and decays back in. The result is sounding pretty good!

My frequent collaborator Cody Carpenter has provided some stunning solos to extend the arrangements.

You can check out one of our Protracker versions below!

DRAWING LINES

Having acquired a plethora of books in preparation for this project we have been looking at the Abacus book “Amiga Graphics Inside and Out” this week.

In the last post we were able to show off the moveset with text feedback, so we are now attempting to draw something on screen from code.

With the help of the book we were able to get the following working :)

TESTING THE MOVESET

Using the design I previously spoke about we have now been able to implement a control system that has basic moves, a jumping mechanic and a combo system.

Using the shell and a joypad I can now execute moves!

The values show the timings between combo attacks.

The jump shows the Y position going up and coming back down using a gravity calculation.

DESIGNING THE GAME ENGINE

Now we have a joystick input and feedback system we can start to flesh out the skeleton of the game engine.

The approach we are taking is for each player or enemy on the screen to be governed by states and rules. The rules are most likely to be quite simple like “canBeHit”. Currently this is the only rule, but that may change..

While the states will be things like “idle”, “walking”, “attacking”, “jumping” etc… In each state the rules can be turned on or off. This is how we limit what the player can and can’t do in certain states.

When they are in the “idle” state they will have access to functions like “BasicMoveset()” and they can be hit. While in contrast if they are in the “floored” state they won’t have access to any movement functions and they won’t receive hits.

The player and enemies will also have variables like “walkspeed”, “health”, “lives”, “gravity”, “jumpspeed”, “fallspeed” and then position calculation values like “xpos”, “ypos” and “xvector”, “yvector”.

Combo variables will control the timing and slickness of combo attacks. This is vital to creating a fluid fighting experience.

Each player will also hold an enemy queue, this will determine which enemy will attack which player and whether it’s from the front or back. The queue will be governed by variables like “distance to player”. If say the enemy is hit to the floor they will be removed from the queue for the time being, and another enemy will take their place in the queue.

CUTSCENES

For the sake of memory management and giving us the opportunity to do things like swap palettes, assets and disks we will put cut scenes into this version.

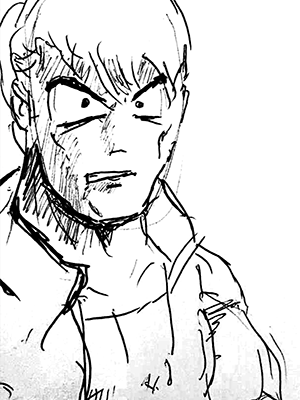
We will probably borrow most of the text written for the GBA version but will create new artwork in a Japanese art style.

Eyes were a very distinctive feature of the original in game sprites, so our cutscene art will use this concept and provide some continuity between the in game sprites and the cutscene art.